When you use a form control with date and time fields in PowerApps, it automatically generates a data card with a date picker, plus two dropdowns for hour and minute—in 24 hour time.
Now, I don’t know about you, but here in the U.S., where we’re used to the 12-hour AM/PM format, it’s kind of surprising that Microsoft hasn’t made this behavior easier to configure!
Therefore, I sought to build my own solution to this annoyance by achieving the following goals:
- Combine the Hour, Minute, and AM/PM format into one single dropdown control.
- Allow for interval-based time selection (e.g. 30 minute increments of time).
- Flexibility to use 24 hour time if desired.

Create the PowerFx Code
In your App OnStart Code, copy/paste the following and run the code.
Set(
    varUse24HourTime,
false
);
Set(
    varTimeInterval,
    30
);
ClearCollect(
    colDateTime,
    ForAll(
        Sequence(
            1440 / varTimeInterval,
            0
        ),
        AddColumns(
            {
                DateTime: If(
                    varUse24HourTime,
                    Text(
                        TimeValue("00:00") + DateAdd(
                            TimeValue("00:00"),
                            ThisRecord.Value * varTimeInterval,
                            TimeUnit.Minutes
                        ),
                        "h:mm"
                    ),
                    TimeValue("00:00") + DateAdd(
                        TimeValue("00:00"),
                        ThisRecord.Value * varTimeInterval,
                        TimeUnit.Minutes
                    )
                )
            },
            'Minute',
            Minute(DateTime),
            'Hour',
            Hour(DateTime),
            'AMPM',
            If(
                !varUse24HourTime,
                Right(
                    DateTime,
                    2
                )
            )
        )
    )
)
You can adjust the “Use24HourTime”, and “TimeInterval” variables to your liking.
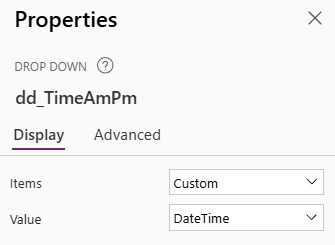
Next, add a form control with a datasource that uses a date/time field. unlock your existing date and time field. Add a new dropdown control within the datacard. For the dropdown, (which I’ll refer to as dd_TimeAmPm) ,set the Items property to the collection colDateTime.
Set the Value property of the dropdown to “DateTime”.
For the dropdown’s default property, we’ll need to account for the form mode being in form mode new or not. If it’s in new mode, round up to the nearest time based on the current time and the interval you set. For example, if the current time is 6:09 PM and you’re using a 30-minute interval, the default will round up to 6:30 PM. If the form is not in new mode, lookup the current time of the record’s date time field from the colDateTime collection.
With(
    {
        TimeFormat: If(
            varUse24HourTime,
            DateTimeFormat.ShortTime24,
            DateTimeFormat.ShortTime
        )
    },
    //If form is new mode
    If(
        Form1.Mode = FormMode.New,
        Text(
            DateAdd(
                DateValue(Today()),
                Hour(Now()) * 60 + RoundUp(
                    Minute(Now()) / varTimeInterval,
                    0
                ) * varTimeInterval,
                TimeUnit.Minutes
            ),
           TimeFormat
        ),
        // Else Not New - Fetch the record's time from the collection
        LookUp(
            colDateTime,
            DateTime = Text(
                varRecord.'Start Date Time',
                TimeFormat
            )
        ).DateTime
    )
)
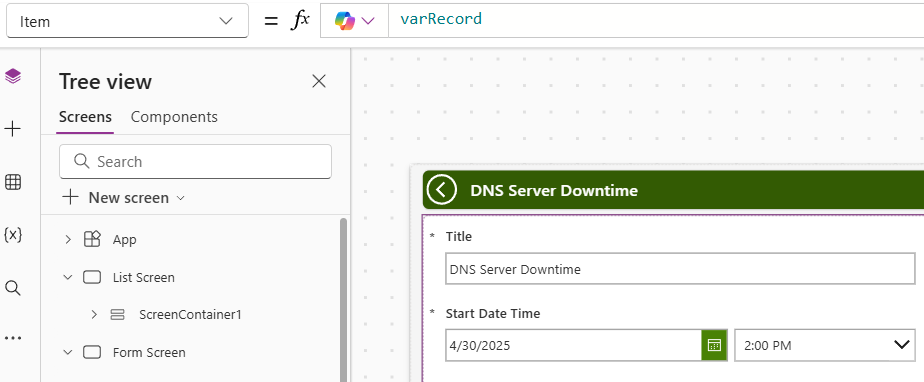
The Form uses the variable varRecord as its Item property. The form edits this record, and in this example, 'Start Date Time' is the date/time field. Adjust this to match your field’s name.
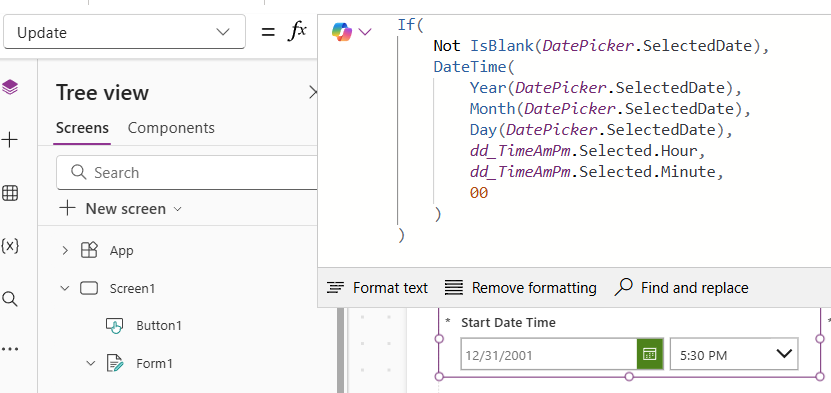
For the Update Property of the Data card, change it to the following formula:
If(
    Not IsBlank(DatePicker.SelectedDate),
    DateTime(
        Year(DatePicker.SelectedDate),
        Month(DatePicker.SelectedDate),
        Day(DatePicker.SelectedDate),
        dd_TimeAmPm.Selected.Hour,
        dd_TimeAmPm.Selected.Minute,
        00
    )
)
At this point, you can delete the existing hour, separator, and minute controls if you haven’t already. You’ll get some errors related to the Y Property of the error message. You can set this to dd_TimeAmPm.Y + dd_TimeAmPm.Height
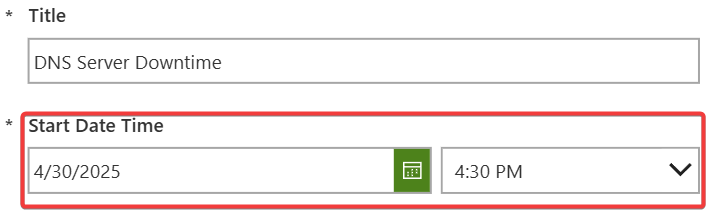
The End Result
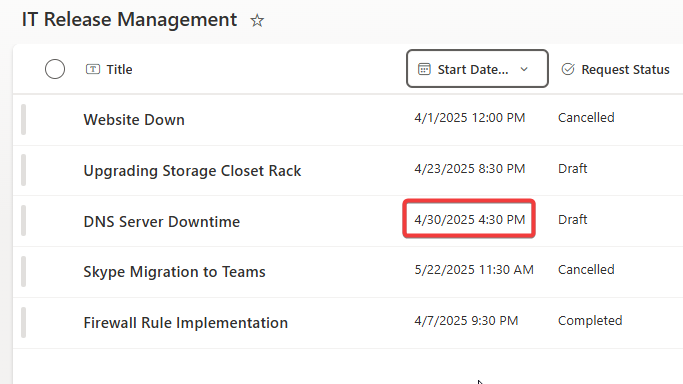
The form example below shows the input and the resulting saved data in the SharePoint backend. Looks good!