
The Dataverse Web API offers a range of practical applications that can really elevate your Power Platform skills. Imagine being able to perform full CRUD operations on your Dataverse tables using a script for automation, migration, testing and a lot more! I’ll be using my PowerShell scripting experience to create the scripts, so having a basic understanding of PowerShell and Restful APIs will be helpful.
We’ll start by creating and configuring an App Registration in Entra (formerly Azure), then set up the necessary permissions in your Power Platform environment. Finally, we’ll create a PowerShell script to request an access token, giving us the authorization to make API calls to your Dataverse data. As the saying goes, we need to crawl before we can walk—and eventually, run! Let’s take it step-by-step. Ready?
Before getting started, open a text editor such as notepad. We’ll need to jot down some important values for later use.
Create an App Registration in Entra
- Go to https://portal.azure.com/
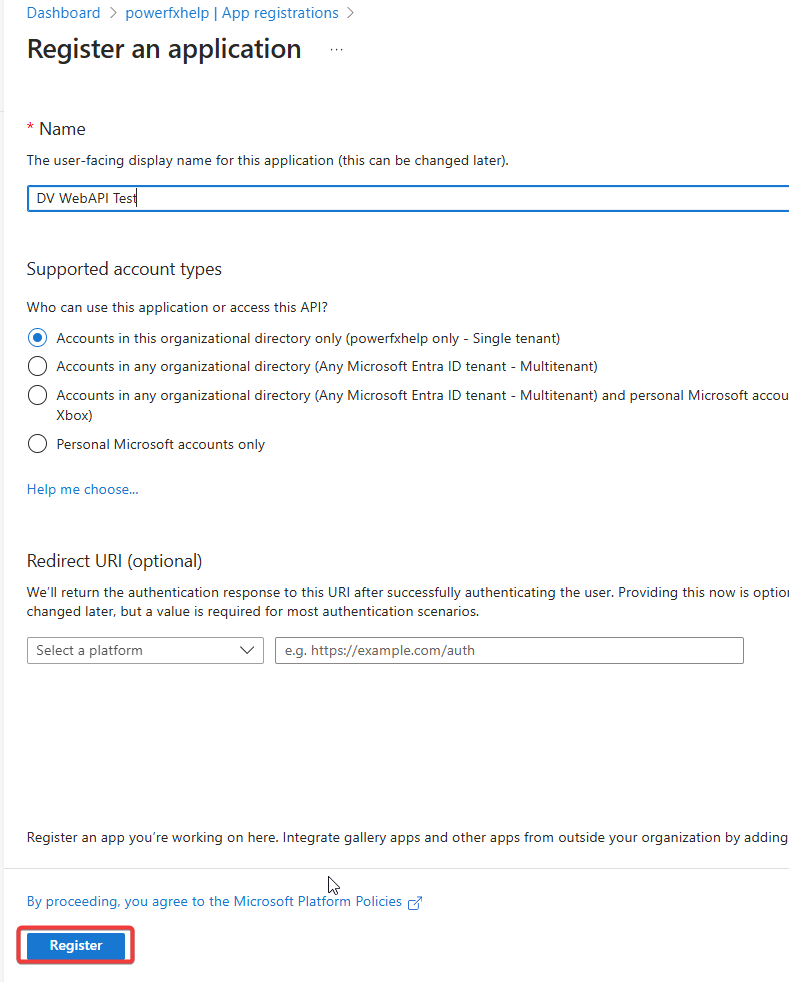
- In the blade menu, go under Manage > App Registrations and click on + New Registration
- Give it a unique name and leave all the options as-is. Click Register.

Configure Client Secret and Permissions
We’ve created the App Registration, but it currently can’t “do” anything. We need to generate a client secret and grant it permissions for Dataverse.
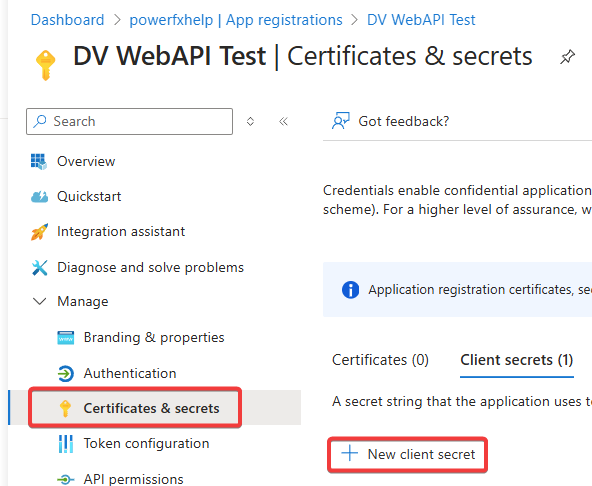
- In the left side menu, go to Manage and then Certificates & Secrets
- Click on + New Client Secret
- Give it a description and choose the expiration time (recommended is 180 days). Click Add.
- Copy the Secret Value NOT the Secret ID into your notepad.
It’s important to treat your client secrets like passwords. Store them somewhere securely! Also, once you navigate away from the screen, that value will no longer be view-able. If you forget to copy it, you’ll have to delete and generate a new secret

Let’s add the API permission next.
- Under Manage again, go to API Permissions
- Click + Add Permission
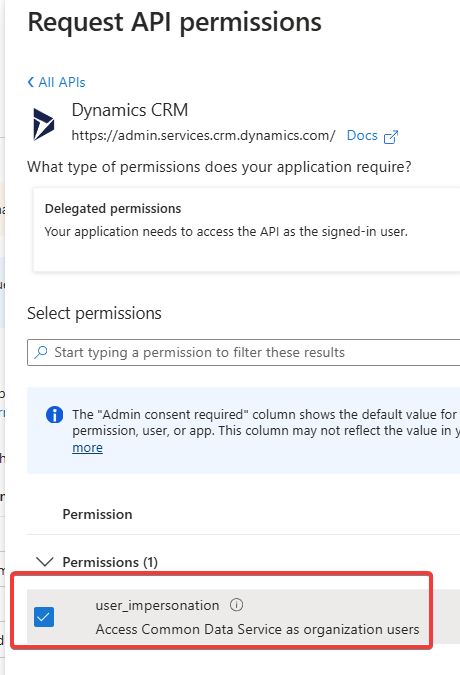
- Locate “Dynamics CRM“. From there, click the user_impersonation permission.
- Click “Add Permissions“
- You’ll need to grant Admin Consent for this permission. Depending on your permissions in Azure, you may need to involve your IT Department to Grant the Admin Consent.
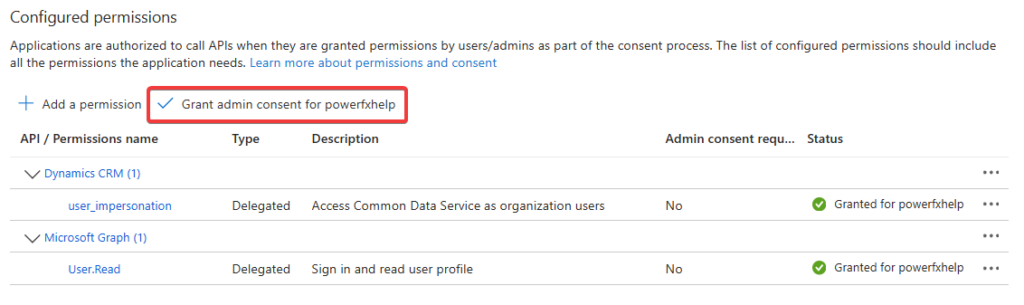
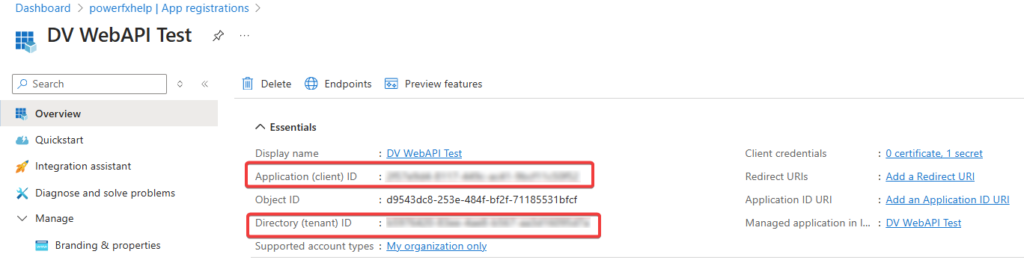
With the Admin Content granted, go back to the Overview section of your App Registration. You’ll need to copy the Application (Client) ID and Directory (tenant) ID addition to the client secret from earlier.
Add the Application User and Set Security Role
Back on PowerApps side, we now need to go the Admin Center: Power Platform admin center
- Click on your Environments and Choose the Environment you’ll be accessing
- In the Details Section of your environment, copy the Environment URL. We will need this later along with the other values you’ve been coping to your text editor.
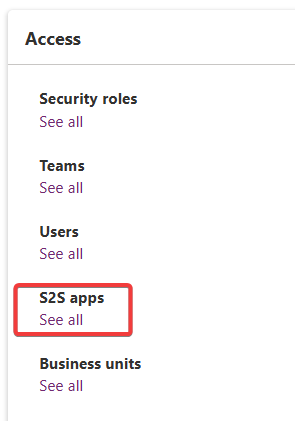
- On the right pane under access, click “See All” under “S2S Apps”
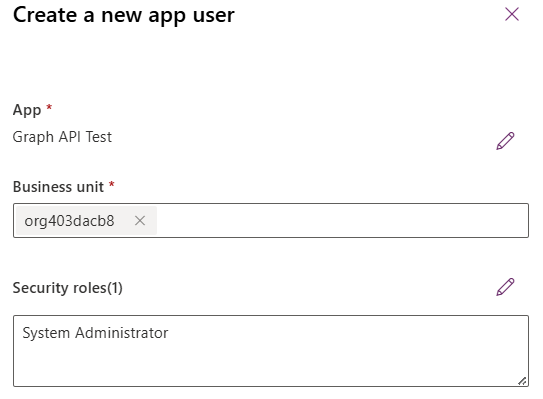
- Click + New App User. Under App, Choose +Add an App. You’ll want to search for the name of the App Registration you created earlier. Once selected, click “Add“
- For the Business Unit, search for “org” and it should list your default business unit for that environment. Use that.
- Finally, for the security roles. For the demo here, I am going to use System Administrator, but your should tailor the security to the minimum required permissions for your use-case.
- Once done, click “Create“
Obtain the Access Token
Alright, we’re past the dry stuff! Now, that our Application User is setup, we need to use it to obtain an access token. This token must be valid and passed each time we make a web request to the API Service as part of the ODATA protocol. Further, we are going to rely on this script a lot so I want to make as modular and re-useable as possible, so I’ll create a PowerShell function in Visual Studio Code.
Function Get-DataverseAccessToken {
    <#
    .SYNOPSIS
    Fetches an OAuth2 access token for authenticating with Microsoft Dataverse using an Entra (Azure AD) Application User Account.

    .PARAMETER ClientId
    The client ID of the registered application in Azure AD. This is required to identify the application requesting the token.

    .PARAMETER TenantId
    The Azure AD tenant ID. This is used for authenticating with Azure AD and identifying the tenant under which the application is registered.

    .PARAMETER ClientSecret
    The client secret associated with the registered Azure AD application. This is required to authenticate the application and obtain the token.

    .PARAMETER EnvironmentURL
    The Dataverse resource URL (e.g., `https://yourorg.crm.dynamics.com`) used for determining the scope of the access token.

    .EXAMPLE
    Get-DataverseAccessToken -ApplicationID "your-client-id" -TenantId "your-tenant-id" -ClientSecret "your-client-secret" -EnvironmentURL "https://your-dataverse-url"

    #>

    param (
        [Parameter(Mandatory=$true)]
        [string]$ClientId,

        [Parameter(Mandatory=$true)]
        [string]$TenantId,

        [Parameter(Mandatory=$true)]
        [string]$ClientSecret,

        [Parameter(Mandatory=$true)]
        [string]$EnvironmentURL
    )

    # Parameters for OAuth Access Token Request
    $authParams = @{
        URI = "https://login.microsoftonline.com/$($TenantId)/oauth2/v2.0/token"
        Method = "POST"
        ContentType = 'application/x-www-form-urlencoded'
        Body = @{
            client_id = $ClientId;
            client_secret = $ClientSecret
            scope = $EnvironmentURL + "/.default"
            grant_type = "client_credentials"
        }
    }

    # Request Access Token
    Invoke-RestMethod @authParams -ErrorAction Stop
}
Save the file with a name such as GetDataverseAccessToken.ps1. We will reference this function inside other PowerShell Scripts by means of dot-sourcing. In your new PowerShell script, include the following code. You will want to updates the values in the $Params variable from your notepad.
# Dot Source Script
. .\GetDataverseAccessToken.ps1

$Params =@{
    ClientId =  "ClientId Guid Goes Here"
    TenantId =  "TenantId Guid Goes here"
    ClientSecret = "SomeSuperSecretThingHere"
    EnvironmentURL =  "https://yourorgname.crm.dynamics.com/"
}

$authResponseObject = Get-DataverseAccessToken @Params
You should not expose your Client Secret in Plain Text for security reasons! There are secure ways to encrypt/decrypt it such as using Import-Clixml.
We call the function name and it’s return contents will be captured in the $authResponseObject variable. If we print that variable out, it’ll look like this:

Awesome! With a valid access token, we can now make HTTP Requests against Dataverse.
Putting it all Together
Here’s an example making a get request to fetch 5 records from my contacts table; selecting just the fullname and email address columns:
# Dot Source Access Token Script

. .\GetDataverseAccessToken.ps1

$Params =@{
    ClientId =  "ClientId Guid Goes Here"
    TenantId =  "TenantId Guid Goes here"
    ClientSecret = "SomeSuperSecretThingHere"
    EnvironmentURL =  "https://yourorgname.crm.dynamics.com/"
}

# Get Access Token

$authResponseObject = Get-DataverseAccessToken @Params

$Header = @{
    "Authorization" = "$($authResponseObject.token_type) $($authResponseObject.access_token)"
    "Accept" = "application/json"
    "OData-MaxVersion" = "4.0"
    "OData-Version" = "4.0"
    "Content-Type" = "application/json"
    "Prefer" = "return=representation"
}

$URI = "$($params.EnvironmentURL)/api/data/v9.2/contacts?`$select=fullname,emailaddress1&`$top=5"

# Fetch Contacts

$ContactValues = (Invoke-RestMethod -Uri $URI -Headers $Header -Method Get).value

# Ouput the results from ContactValues

$ContactValues
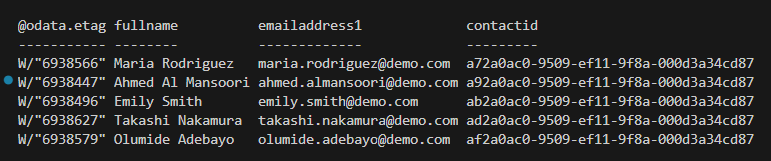
Pretty cool, huh?! This just scratches the surface of what’s possible. In my next post, I’ll do a further deep dive of the most common CRUD operations you’ll do in Dataverse. Until then!